
HOW TO INSTALL PYROTEX FIRESLEEVE IN 6 EASY STEPS
 Step 1:
Determine line outside diameter (OD) & acquire Pyrotex Firesleeve with matching inside diameter (ID).
For example, a 1″ OD Hose requires 1″ ID Pyrotex Firesleeve (PT16200-10).
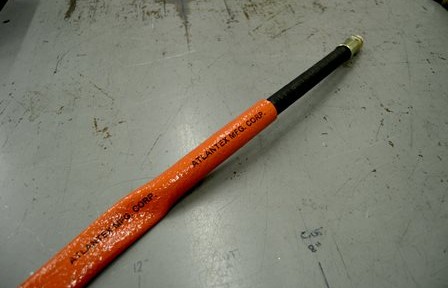
Step 1: Slide sleeve over hose end
Step 2:
Cut sleeve to required length and slide Pyrotex Firesleeve over line end.
 Step 3:
To assist in sleeve installation, utilize lightly compressed air
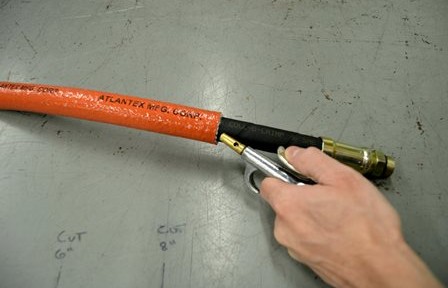
Step 2, 3, 4: Lightly compressed air aids in installation
 Step 4:
Slide sleeve completely over line. Skin sleeve back from uncoupled end to allow for fitting installation, if required.
Once fitting is installed, finalize sleeving and center Pyrotex Firesleeve on line.
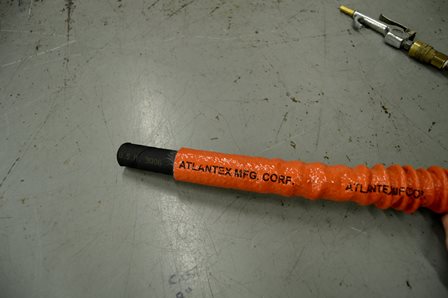
Step 4: Slide sleeve back to allow for fitting installation
 Step 5:
Firmly attach band clamp near both sleeve ends.
Follow proper installation instructions for your exact band clamp system.
Step 5: Slide firesleeve up to fitting & secure with band clamps
 Step 6:
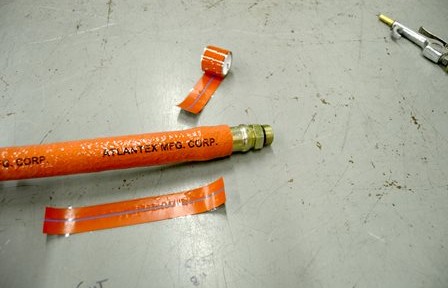
Terminate sleeve ends with Pyrotex SA Tape to prevent fluid wicking, thermal transfer, and glass fiber escape.
On dry, clean Pyrotex Firesleeve, apply 1 wrap around sleeve, then proceed to wrap towards
fitting ensuring 50% overlap of Pyrotex SA Tape.
When sleeve end is fully wrapped and terminated, press firmly on Pyrotex SA tape to ensure
proper amalgamation and sealing.
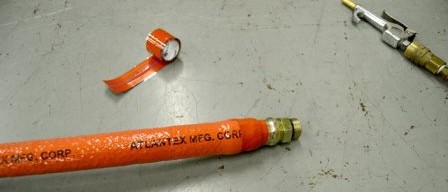
Step 6: Pyrotex SA to terminate sleeve ends